Repost from early 2010 – fixing “early blogger” glitches!
You’ve seen my laundry room go from drab to fab in my Laundry Room Redo posts (here’s the first of three!) and then yesterday I showed you my fun, cute, and compact coat hooks/shelf that I made from some scrap wood and a Goodwill find. In that post I showed you my new shoe organizer as well, and I promised details, so here they are!
Alright. I know I’m not the only one who deals with piles of shoes in entry ways. Our entry area from the garage is teeny weeny, and it’s a corridor to the main level bathroom and the basement, so it really can’t be clogged up with stuff to trip over. See how much space there is here?
Not. Much!
I needed something of VERY specific dimensions to sit against the very small area of exposed wall. I was first thinking I’d like something like a used two-drawer file cabinet, with the drawers removed. Then I was going to put baskets or bins of some sort in place of the drawers.
Well file cabinets are way bigger than this space allowed, so I kept looking.
I ended up settling on this guy, the “Double Cube Plus”:
I got him from Wally World and I paid full price (sadly) because it fit the exact measurements I needed and I’m not confident I can build stuff like this (yet). One of the coolest things about it is that if/when I ever decide it needs to be trashed, it can be recycled with our paper recycling! It’s pressed paper! You’d never know it though. It’s very sturdy, and surprisingly lightweight.
Got it home, put it together (it goes together with double sided tape, believe it or not), put it up next to my brand-new white beadboard…..and it looked positively yellow.
So. I showed it who’s boss. Sanded, primed, and used a sponge roller to paint it with the same white paint as my trim. It did take a few coats of paint, and sanding in between, but the finish looks great.
Then I needed the bins/boxes/baskets/storage receptacles (yes I said “receptacles”!) for the openings. The company who made the shelf could really capitalize on offering accessories (hint, hint company) that work with the furniture, but alas, they don’t.
I had the same problem while looking for my bins– I had specific measurements I needed to fill. I decided I didn’t need a bin for the bottom cubby after all. Shoes fit in there really well and I think we fit more in that way than we would with a bin. But the top bin needed to almost fill the space, meaning tall sides especially (to hold maximum stuff, of course!)
I finally found this, at Lowe’s:
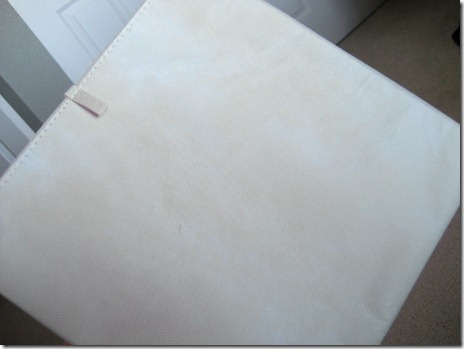
Lucky me it didn’t come in white. I had to buy the “natural” color. Boy howdy it was ugly! I was expecting hoping for a canvas color and I got powder yellow.
Here’s a shot to show the contrast!
And the yellow piece has white paint on it too!
I tried painting it with spray paint and with a roller. Neither worked. The paint absorbed into the fabric differently and was very blotchy. I also forgot to take a picture of the blotchy, icky paint results. BUT, here’s a shot of what the current inside bottom of the bin (my practice area was the bottom) looks like held up to the sunlight. Sorry I didn’t take a picture of the bad paint before I put the fabric on!
Plan B (always a Plan B!) was to cover the thing in fabric. WHITE fabric of course!
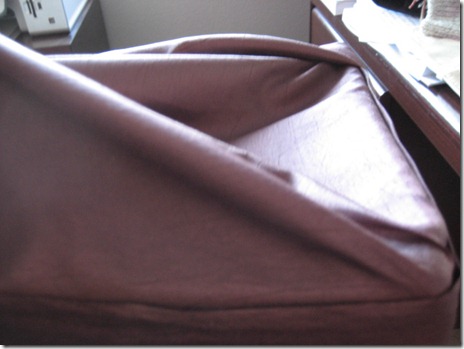
I popped over to Jo-Ann and picked up some white duck cloth (basically canvas) and I found a great purply-brown fabric for the lining. (Don’t remember what kind of fabric it was, but my iron melted it – does that help?)
I first wrapped the handle, hot gluing the edges of the fabric on the back. I cut the handle fabric longer than the handle itself because I wanted the edges sufficiently hidden.
If you look closely, you can see a square of brighter-white to the right of the handle here. That’s the handle cover fabric which was then covered up.
I then wrapped the outside of the bin like a present, using the duck cloth and hot glue. I of course wrapped up the front edge first, and I cut a slit that looked like this l———-l for the handle. The two flaps on top and bottom of the horizontal portion of the cut then just flopped right back down under the handle. I used hot glue to stick them down, and hot glue at the attached ends of the handle to seal the now cut-and-fraying edges. I made sure to make my “gift wrapping” folds so that both sides would look the same.
I wasn’t happy with the seam of exposed edges under the handle though, so I took a small piece of the cloth, pressed both edges under, and hot glued it over the top of the seam.
Then I finished wrapping, folding the white fabric over the top edge a couple of inches.
Next came the lining. I started off by pressing a crease into one edge of my square yard of fabric (this is where I melted the fabric and had to turn the iron down…oops!). I pressed the crease, folded it over itself, and pressed again. Then I used hem tape to make sure that second crease was permanent. Then I tightly wrapped that nice folded edge around the front top edge of my bin.
I messed with it until I knew it would work, then I glued the corners down right where the fabric started around the corner. I continued gluing this creased edge around top of the SIDES of the bin (not the back yet). See how the front, and both sides are comprised of only ONE edge of my square yard of fabric?
For the back, I rolled the last exposed edge of fabric under a few times, fussed with it a bit to get it looking right, and then I simply hot glued it down. See how there’s no crease on the back section?
And see all the extra fabric in there? That’s perfect because I saved the little inside-bottom-liner piece, and when I slide it down into the bin, it pulls all the fabric tight along the sides and hides the extra underneath!
Then I dressed up the front with a little stencil and my leftover laundry room wall paint:
 It looks a little Rorshach-ey (the ink blot test guy – did I spell that right?) but I think that helps to make it look a little more loved/used and less brand-spankin-new.
It was exactly what we needed in this little space, AND it’s cute too! I can’t wait to see what it will hold during the summer months. Probably flip flops : )
Have a great weekend! Now I’m going to go paint my kitchen ceiling. I finally found the right paint color!
I’m also going to play with my new “color of sick” kitchen paint samples….I’ll show you Monday!


I'm so jealous! I wish my entry way could look this nice! My cat is like a teething puppy. Those cubbies would be his caves and he would sit and chew up anything in it!Very inspiring, tho! 🙂
LikeLike
whoaa..I like that pink colortell me, do you buy it or you redecorate the cabinet?
LikeLike
Thanks for your comment Roger! Actually, the photos uploaded with that funky pink hue, but the beadboard, shelf, and organizer are all white. I purchased the organizer, which was a cream color, and I painted it bright white to match the wainscoting. Great reminder that I need to take some new, better pictures of this spot!
LikeLike