I am so EXCITED to show you our laundry room redo!!! It was a bit of a learning curve, but it feels so “us” now. But first, I need to clarify that we don’t actually have a laundry room. We have a laundry closet in a little corridor between the garage and the kitchen. The corridor happens to be “L” shaped, and the powder room and basement door are off the other side of the “L”.
So we have a laundry area 🙂
There were only a couple things actually “wrong” with this space. First, there used to be a small 3-hook dealy-bob on the wall as you came in from the garage. It was ok, but the hooks caught on stuff a little more than they should. Off to Goodwill it went. Then, our shoes were piling up just inside the garage door, which meant there was a pile right where we needed to walk. Both of these issues = storage problem near a major entrance to the house.
The other “problem” was a missing piece of trim. No big deal.
Sadly, I don’t really have any good “before” pictures since the room was just so blah I guess no one ever thought to take one. But we’ll get to some before pictures that were *after* a little progress had been made. (I’ll get better at the picture thing, I promise!)
The room was painted a pale yellow. You can kind of see it in the pic above. One coat. And the underneath-white was peeking through ALL OVER THE PLACE! I appreciate that someone at some point covered up the basic white…but …..well I just have to fix it. Our kitchen/dining room are painted similarly. I can’t wait to cover that up too!
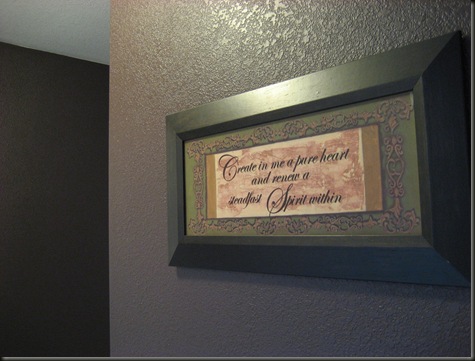
I wanted a really FUN color for that area, since it’s small and easy to redo if I get tired of “fun”. I went through my options and settled on a deep purplish brown. I took my inspiration from this little piece of art we have hanging in the “laundry hallway”:
Bonus! Hubs liked the color too! And just recently someone asked us “What color IS that?” Fabulous and ambiguous! That must mean it’s a neutral 😉
Then I saw Sarah do beadboard on her kitchen island over at Thrifty Decor Chick (she is such a go-get-um!) and I was inspired to do beadboard in the laundry room, which, painted white would balance out the dark color beeeee-utifully!
But I’ve never used a power saw. And I’m kind of afraid of it. And I read that you have to take the baseboards off first. And get an extension kit for your electrical outlets. And it’s a teensy area – who wants beadboard cutting into your space by a half inch on each side?? And it just sounded really scary!!!!
So after much research, I settled on beadboard wallpaper. MUCH better. I’m sure I can figure out this wallpaper stuff. My plan was complete: dark walls, white chair rail (my first attempt at putting up molding) and beadboard wallpaper painted white to match my “new” clean white trim. And *something* for that shoe/coat problem by the door, but that was a secondary priority.
I started off by painting the trim and doors with my bright white trim paint. I had a little practice under my belt from the powder room facelift, so it was a little easier this time around. Then I painted the upper portion of the walls with two coats of the purply color. (My can doesn’t have the color name written on it, goshdarnit or I’d use it….)
Here it is after painting trim and walls, and also after installing the chair rail, but before anything went up on the bottom portion of the wall. I love the combination of the cherry-ish floor, white doors and dark upper walls 🙂
I probably don’t need to talk much about paint here. One trick though: take two pieces of foil (unless one piece would fully line your tray) and seam them in the middle by stacking them and then folding one edge over a few times. Then unfold the two pieces which should have a nice seam in the middle, and press into your paint tray. SOO much easier for cleanup! Just pour whatever’s left back into the can, let the rest dry, ball up the foil and toss! Tray cleanup is done! Do you all know how to do really clean edges? If not, remind me and I’ll do a different post about that little trick too. (Yes, it involves tape, but not JUST tape…)
This picture was taken when things were unfinished but still going smoothly. Right after this is when things changed the shizzle hit the fizzle. I’ll get to that tomorrow!


Love the \”neutral\” paint! Great job so far … keep up the good work!
LikeLike
Thanks Katherine! I figure if the paint counter guy gave his stamp of approval it must not be purple! Thanks so much for the comment 🙂
LikeLike
Never heard of your paint tray trick….. and I'm supposed to be a pro at paint! Ha! I am going to have to try that. I was considering the beadboard wallpaper for my boys bathroom. Was it easy to hang? (I've never done wallpaper!)
LikeLike
Hi Magic Brush! Love your name 🙂 In a nutshell, I failed miserably at the beadboard wallpaper, and I tried several times, each slightly differently. I wrote all about it in my Laundry Room Redo Part II post if you want more details. If you still want to do it after that post – I'd be happy to email you the brand of paper I used so you can avoid it (like the plague!)
LikeLike