Repost! Once again…had to fix the early-blogger-glitches ![]()
As much as I 1) like saving money and 2) admire those who are brave enough to try something totally new and seemingly really difficult in the name of DIY, this project was almost entirely handled by professionals. I made the hole in the cubby with a pry bar and that’s as brave as I got. 🙂 I know you’re impressed!
But with a fireplace involved, we didn’t want to mess with gas lines, moving electrical boxes, or dealing with the permit required from the city (because we had to move the vent over one stud – gah).
In short, we knew we were way out of our league. We also needed a professional, experienced eye to tell us if something about our idea/design wouldn’t work for whatever reason. Luckily all systems were ‘go’.
So to all my DIY bosom buddies out there who are generally not afraid to get in there and Get-er-Done – I’m sorry I don’t have much to show you DIY-style with this one. But don’t you worry! Lots of DIY to come.
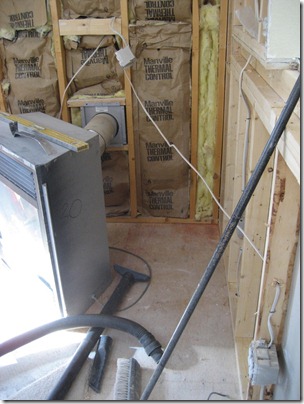
ONWARD! Our contractor started right away and this was the first thing he did on Day 1:
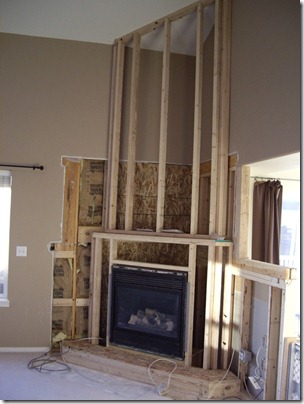
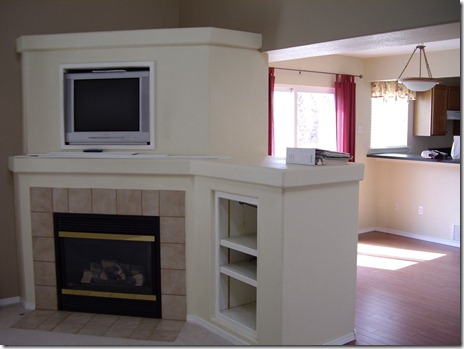
Look at how much wasted space is back there! We NEEDED that space in our teeny living room!!! So we scootched the new fireplace as far into the corner as possible (and we centered it like normal people.)
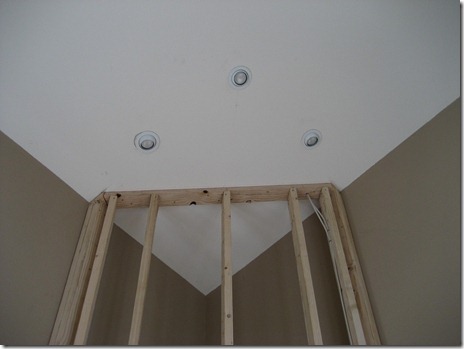
Then we extended the “chimney” all the way to our vaulted ceiling. We thought it would add some drama and use up a bunch of air space that’s not good for much else other than hoarding all of our warm air from the fireplace.
TWO cat toys were found on top of the structure. The sellers must’ve thought that was a good place for cat toys when they had a showing coming up? Or their cat was amazingly acrobatic? (I know most are, but ours never even attempted to get up there…)
The one convenience about the old fireplace was the conduit running between the cubby and the component thing. Because this is really the only good place for a TV in this room, we kept that feature (so we could put the TV up above the mantel) and we added recessed lights to highlight the final product. We eliminated any sort of built-in component shelves/cabinet to give flexibility to put a piece of furniture there instead.
Then the drywall was installed, taped, mudded, textured, and painted.
We just did the painting. Pros did the drywall stuff.
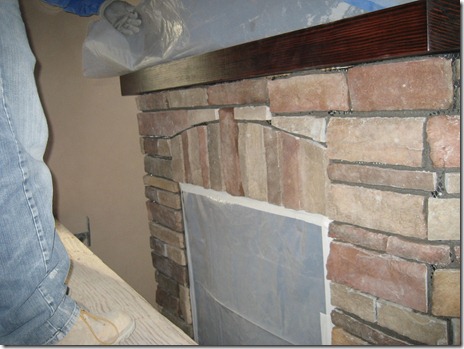
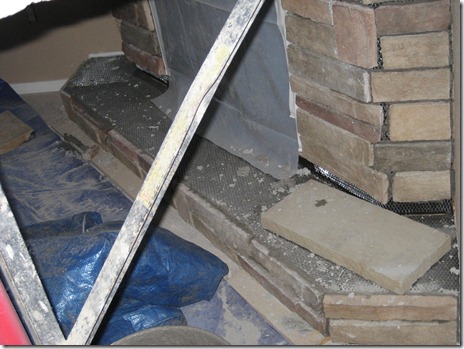
Then in went the fir mantel (after some late-night staining in the garage) and the stone masons got to work. Have I mentioned we had an awesome contractor and all of his guys were equally awesome? They did such a great job. We’ve heard since then that it was unnecessary for the mason to put up mesh (for an interior project) but that it’s a sign of a quality job. A tip for the toolbox!
We felt like we were being fumigated for a few days with that huge scaffolding and tarp set up.
Here’s how we handled the future TV mounting bracket. Mr. Contractor installed 2×4 blocks which were substantially reinforced (connected multiple ways to the framing studs), and then the masons worked around them.
I showed the stone mason a picture of some pretty stonework along the top of a curved-top fireplace. It was mostly just to ask if a keystone would work for a flat-topped fireplace and he said not really.
But then he came up with this! A beautifully rustic arch just for us.
We also opted to add a hearth. I wanted a place to put decor stuff. And we think it will work for extra seating if needed. What can I say? It’s a small living room!
Almost done. Just needing the hearth stone. Can you see where the carpet is missing from the old footprint? We gained about 3 inches of floor space in front, plus the 10 inches of the hearth and of course the area under the old component thing. The floor still looks like this, unfortunately. We’re working on that little problem.
But the GOOD NEWS is…..my cat matches my color scheme.
I love planned that.
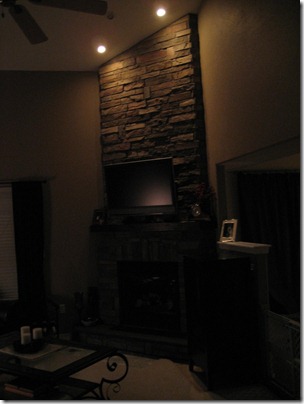
And the final product…
We put the middle light on a separate switch. It points slightly outward, into the room, to provide some overhead light when needed, while the other two lights are directed at the stonework.
We’re also not wild about the media cabinet we found. It might be a little too big, but it has to work for now. Don’t mind the baby gate. It’s a project for later 🙂
The hearth is stained and sealed with a stone sealant. We thought about leaving it the natural sandstone color of grayish, but it was VERY bland.
The TV’s “bionic arm” extends a ridiculous distance into the room. I think it also holds about 3x the weight of our TV. Hubby was paranoid his TV would fall 🙂
The TV plugs into an outlet right behind it, and two HDMI cables run through the conduit and down into the media cabinet. My hubby bought some kind of a “switch” thingy so we can operate more than two components with just those two cables.
We love it! Our living room feels so cozy and wonderful now. Living room decor has changed a bit though. More on that later 🙂
BEFORE:
AFTER:
Our whole neighborhood is full of “convenient” little TV cubbies that totally don’t work for flat screen TVs. (Maybe I look in people’s windows as we drive by at night?) Sue me ![]()










That looks amazing!
LikeLike
So changes the look of the room! And I could totally see MY cats getting up on the top of the previous box. But they compete for the top of the fridge now.
LikeLike
Oh my gosh it is stunning! It totally transformed the room.
LikeLike
awesome treansformation! where was this when i was compiling ideas for my fireplace! we are doing it totally diy, but i love the ideas your contractors came up with. sometimes i'd like a pros assistance! love your dark mantle, and the stonework. such character and sooo much better for the space!
LikeLike
New follower. It looks awesome! Love it! And the lights are a nice added touch.
LikeLike