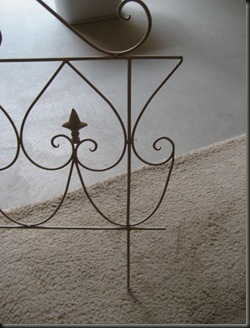
A couple months ago, I picked up these garden thingys from Hobby Lobby. They looked perfect for something in my “Secret Garden” themed guest room…but what I would do with them I wasn’t quite sure. Some kind of headboard came to mind.
I set them aside until a good idea could come to mind (plus I was really busy with work for a few months)… and then all of a sudden
I knew what I would do attempt to do!
This picture was my inspiration:
And this is the “before” of the room:
Disclaimer: I’ve never built anything. I’ve never taken a woodworking class. I’m a chick. Loud tools kind of scare me. If I can do this project…..and I did…..you can too!
First, I headed to Home Depot to find some newel posts (the big, thick posts at the bottom and corners of railings). When I got there, I found out newel posts are VERY expensive. The one I wanted was $38 (and I needed two! eek)
So I grabbed a 4×4 instead. It was about $8. I had the “Big Saw” (at the store) cut it in half for me.
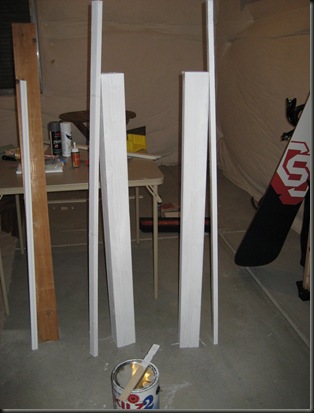
I also picked up a cedar fence plank (I was going for a 1×6, but the cedar plank caught my eye and it’s about the right size, plus it smells good) and two 1x2s, all of which I had cut to size for me by the Big Saw.
Oh, I also picked up some “cap” MDF molding to trim the top of the 4x4s.
First thing I did to the lumber was prime it.
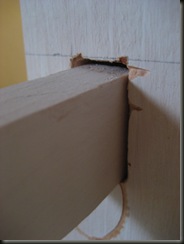
Then I got creative with drilling/carving/mucking out four square holes for the 1x2s to fit into.
This took some time, but it wasn’t too hard. I started by marking my rectangles with a pencil. Then I used my dad’s old Dremel tool to carve out the rectangles. (Thanks Mom for donating it to the project cause!) It was my first time using a Dremel tool and it was pretty neat. I spent some time with the directions and used the only wood carving attachment in the case already.
My sophisticated project area. Don’t worry – that carpet is an old dirty piece that is on the basement floor. The goggles are a must for a Dremel tool. There was sawdust flying “ever-where!”
The holes were certainly not pretty on the inside and you can see in the picture above where the Dremel tool jumped out and carved a little arc in the wood where I didn’t want it. But hey, it’s my first time using this thing, and my first time “carving” anything….and I can fix it with wood filler and paint 🙂 (Or maybe just paint, depending how lazy I am.)
I ended up using a large drill bit to make several holes (as many as I could) in each rectangle. The drill removed a good amount of material, which made it easier for the Dremel tool to then shape the peg hole.
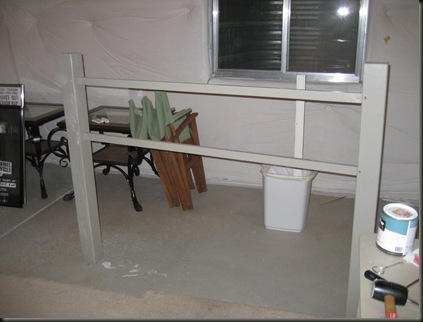
When I finally got the “peg holes” deep enough, I inserted the 1x2s and drilled a wood screw through the back of the 4x4s to hold the ends in place.
My screws weren’t quite long enough, so I used this funny little tool in my toolbox to drill a big hole so the screw could go farther into the wood:
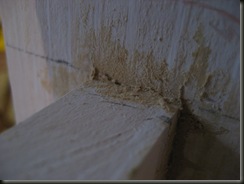
I used wood filler to fill all the gaps:
Then I painted it the same color as the guest room walls (Valspar Coastal Villa)
I added trim around the top using Liquid Nails and brads from my (manual) staple gun. I had a bit of a learning curve cutting the cap pieces since they all need to be at the same angle in order for the cuts to match up, and when you’re holding the trim by hand, it’s easy for the piece to roll a little forward or back as you’re cutting.
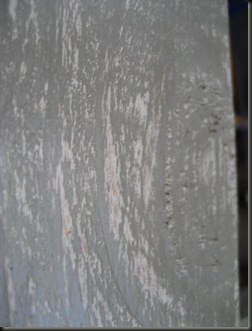
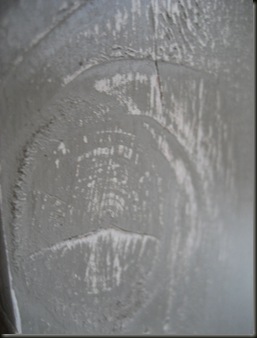
Then I weathered the posts and white trim with sandpaper and this stuff:
A Home Depot employee was very helpful finding something to “weather” my wood and she highly recommended the above “Restor-A-Finish.” She teaches faux painting classes and had a lot of examples of her own projects where she used various treatments. One thing she said she never uses is glaze. She said you can get the same effect by diluting a paint, using stain, or using other products (like above). She thought it was a waste of money. Just thought y’all would like to hear that too, since there are a lot of painting projects out there in blogland.
I added the cedar plank for extra support (unprimed so it will still smell good!), and just screwed it to the backs of the 4x4s. I probably won’t bolt the headboard to the bed frame, and instead I’ll just stand it up between the bed and the wall.
Next I used the Dremel tool to trim the panels to size, which just required a few cuts and some patience. There were a lot of sparks, so I went pretty slow. (The tool came with special “cutting disks” which are designed for metal.)
I used a grinding stone to smooth the rough edges after I cut through the metal pieces. (Also came in the Dremel kit – I would’ve bought a hack saw had my mom not brought the Dremel tool over when she did because frankly, I would never have known a Dremel tool could be so useful!)
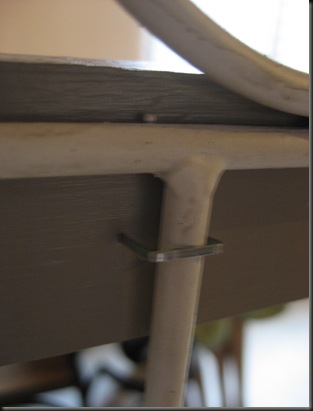
Then I stapled them to the 1x2s using half-inch staples and my staple gun… and it was done!
Before:
After:

What do you think? For $20 (metal things) + $15 (lumber) = $35, I think it’s a winner 🙂
I should also mention I had to buy a fresh quart of the Coastal Villa paint ($11) and the Restore-A-Finish was $8. So you could add those in and the total comes to $54 (but I’ll use those for lots of other projects, so the cost will be spread out.)

The shot above uses a flash, which shows my iridescent stenciling (prior project).


Thanks for stopping by! I’m off to think about my next project….. 🙂
I’m linking up to:
 and Thrifty Decor Chick’s Before and After PartyandMotivate Me Monday andMake it Yours Day at My Backyard EdenandTransformation Thursday at the Shabby Chic CottageandTime Travel Thursday at the Brambleberry CottageandUnder $100 Linky Party at Beyond the Picket FenceandFrugal Friday at the Shabby Nestand
Please stop by some of these blogs and check out all the awesome projects – and be sure to leave some comment love for your favorites 🙂

 and Thrifty Decor Chick’s Before and After PartyandMotivate Me Monday andMake it Yours Day at My Backyard EdenandTransformation Thursday at the Shabby Chic CottageandTime Travel Thursday at the Brambleberry CottageandUnder $100 Linky Party at Beyond the Picket FenceandFrugal Friday at the Shabby Nestand












Love It!!! I'm getting ready to make a headboard also, but out of reclaimed lumber, if I can find some:( Linking up with you from Tools are for women too!!http://andonemoreequalsfour.blogspot.com
LikeLike
Great work, your new bedhead looks fantastic! Thanks for the step by step instructions and the tips. xx
LikeLike
What a novel headboard! You did an excellent job in putting it together and the color is fabulous! Yeah for you! Following you now thru Motivate Me Monday. Pam @ Sallygoodin
LikeLike
Okay I L-O-V-E this! And you did such a great tutorial! Thank you for sharing!
LikeLike
Wow! This is not only a beautiful headboard, but congratulations for taking on such a project! I love seeing women's successes using tools they might not ordinarily use! Great tutorial! Thanks for sharing it on Modern Craftswoman Monday! Rory
LikeLike
Katie, you did an incredible job with your DIY headboard. I would love for you to link this post to my Tips & Tricks linky party.As a matter of fact, I would like you to join me for all three of my parties:ASK THE YANKEE – MONDAYSTIPS & TRICKS TUESDAY TIME TRAVEL THURSDAYYou can get the details here:http://thebrambleberrycottage.blogspot.com/2010/06/brambleberry-cottage-linky-party.htmlEach party runs for six days, so come on by!Hope to see ya there!Liz @ the Brambleberry Cottagehttp://thebrambleberrycottage.blogspot.com/
LikeLike
Way to tackle this project head on yourself! I probably would have chickened out and made my husband do it. Fantastic results!
LikeLike
Wow, I love that you went for it with no prior knowledge! It turned out so great! Thanks for linking up to We Can Do It Cheaper!
LikeLike
This looks beautiful. You really did a great job–and $50 for a headboard is a steal!
LikeLike
Beutiful! What a creative idea.
LikeLike
This is beautiful. What a neat idea!I am hosting a giveaway and I'd love it if you stopped by!Laura @ along for the ride
LikeLike
Your headboard turned out beautiful!
LikeLike
You did a marvelous job!Partying with you today, but mine was certainly no challenge like yours was.
LikeLike
It looks awesome and I'm so proud of you!! You give new meaning to doing it yourself.
LikeLike
I am traveling over from Transformation Thursday. I am so impressed with what you have done! It looks great and I can really see the resemblance to the inspiration piece!
LikeLike
All I can say is WOW! You rock! The headboard is just beautiful.
LikeLike
I love how you did this – thanks for the instructions!
LikeLike
good job ;). my husband doesnt get my dremel addiction. but he did get me a dremel trio for my b day ;). besides girls with power tools are sexy 😉
LikeLike
Beautiful job!!Hi..I’m Barb….I am from Thurs. Trans…. I am your newest follower. I hope you will get a chance to visit my blog @ santasgiftshoppe.blogspot.com& get inspired by something for your family/home. I hope you will follow me as well. Nice to meet ya new friend!!!
LikeLike
This is beautiful!
LikeLike
Great job- Love seeing what is done on a budget. You have inspired me to get out and actually use that dremel I purchased 6 years ago.
LikeLike
And you said you weren't a woodworker. You are now. Love it! Looks beautiful in that room.Brooke
LikeLike
Hi Katie,Thank you for entering your headboard project in Modern Craftswoman Monday. I was really impressed by it and have made you my Great Craftswoman Of The Week. I published a feature article about you this morning. Also, as part of this honor, I have given your picture and A Chirp In The Forest, some free advertising space this week. Congratulations. Please drop by when you can.Rory
LikeLike
it looks so pretty and elegant! and how awesome that you made it yourself- that makes it a billion times better than anything you could get from a store. 🙂
LikeLike
Gorgeous! truly inspired…thanks for sharing and congrats on being featured!!
LikeLike
Wow you are one creative lady! Your bedroom is darling too!
LikeLike
great job
LikeLike
What a great tutorial. my headboard is almost the exact same thing, with a different style of garden fencing/edging. Thanks for sharing.
LikeLike
wow!!
LikeLike
oh my gosh …how adorable… i love this… your just to clever. Thanks for sharing. :o)
LikeLike